Working with Swagger UI as a QCObjects Component
In words from SmartBear:
Swagger aides in development across the entire API lifecycle, from design and documentation, to test and deployment.
Swagger UI allows anyone — be it your development team or your end consumers — to visualize and interact with the API’s resources without having any of the implementation logic in place. It’s automatically generated from your OpenAPI (formerly known as Swagger) Specification, with the visual documentation making it easy for back end implementation and client side consumption.
Now you can use SwaggerUI as a QCObjects component. And It's as simple as that:
<component name="blank" controllerClass="SwaggerUIController" ></component>
Yes, using the SwaggerUIController present in the built-in QCObjects SDK you can easily insert a component with all the UI content of the latest version of Swagger UI
To quick start using QCObjects and Swagger UI in simple steps, follow the next instructions:
- Create a new QCObjects PWA in a new fresh folder
For Linux based systems and Mac:
> mkdir myapp && cd myapp && qcobjects create --pwa myapp
For Windows:
> md myapp
> cd myapp
> qcobjects create --pwa myapp
NOTE: If you haven't installed QCObjects yet, what are you waiting for? Follow the easy install instructions here
- Install the latest version of Swagger UI (dist mode) into your project folder
> npm i --save swagger-ui-dist
- Open any prebuilt component in your generated PWA (I suggest you to edit templates/components/article1.tpl.html) and insert the following code:
<component name="blank" controllerClass="SwaggerUIController" ></component>
And DONE!!
Now you can test and run your application starting the QCObjects Built-In Server. Just write:
> qcobjects launch myapp
And go to: https://localhost in your browser
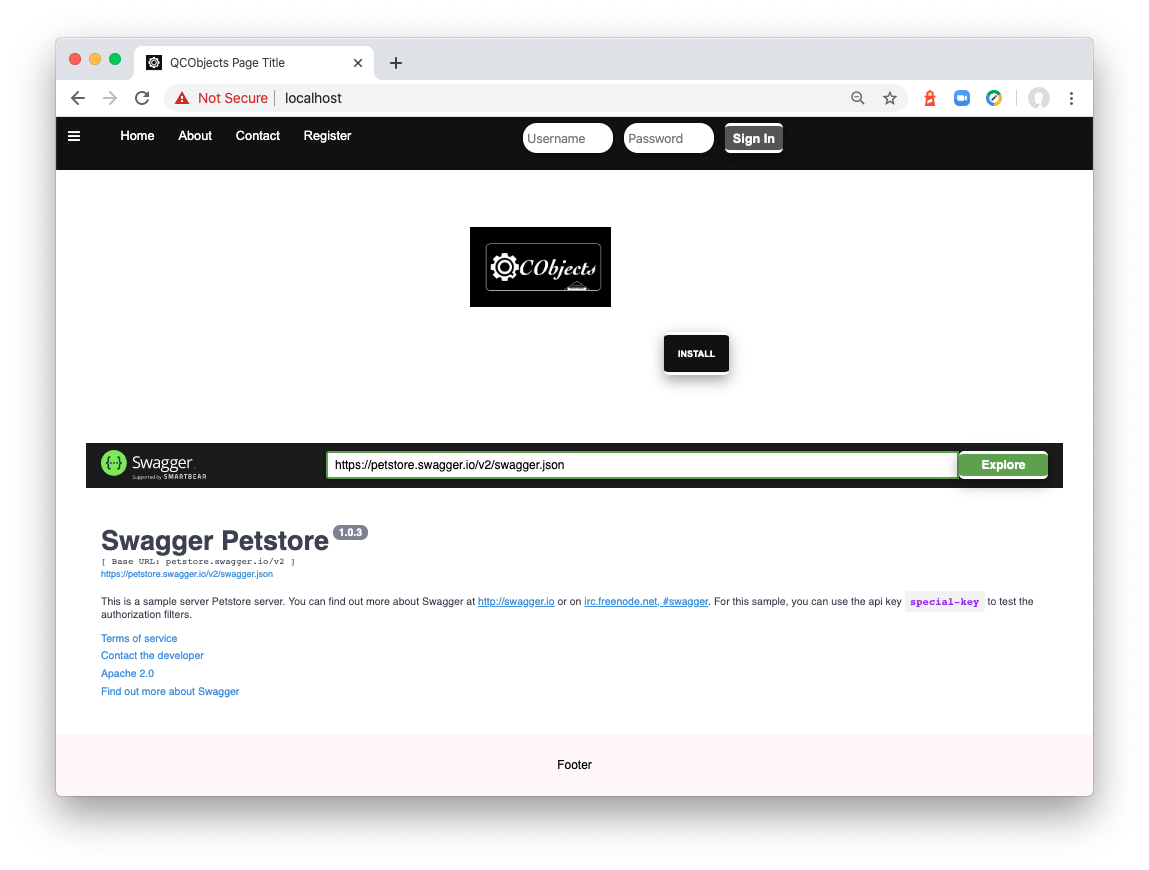
You will see something like this:

NOTE: If you are using Chrome you have to go to chrome://flags and change the #allow-insecure-localhost flag to allow the url localhost to be browsable and test your application without any problem.
Going further with the SwaggerUI Settings:
If you want to go further and customise some things, these are the settings that you can modify to get started:
swagger-ui-package-path
The swagger-ui-package-path setting is meant to allow you to change where QCObjects will find the swagger-ui-dist package installed. The default value for this setting is "node_modules/swagger-ui-dist/"
You can change this using the CONFIG.set method in your init.js file
CONFIG.set("swagger-ui-package-path", "<path to your swagger-ui-dist package>")
Or if you are using a config.json file, edit it and change or add the new value:
{
  "domain":"0.0.0.0",
  "swagger-ui-package-path":"<path to your swagger-ui-dist package>"
   ...
}
swagger-ui-dom_id
The swagger-ui-dom_id value is meant to change the DOM identifier for the swagger-ui container. As you probably know already, it is needed to set a DIV container to load swagger-ui into it. By default, this value is set to "swagger-ui", so internally, the SwaggerUIController will create a new DIV and add it to the component as
<div id="swagger-ui"></div>
If you want to change the div identifier you can set this value by using the CONFIG.set method or adding the value to your config.json file.
CONFIG method in your init.js file:
CONFIG.set("swagger-ui-dom_id", "<your new identifier>")
config.json
{
  "domain":"0.0.0.0",
  "swagger-ui-dom_id": "<your new identifier>"
   ...
}
swagger-ui-url
The swagger-ui-url is where the swagger format json file to be examined by SwaggerUI is located. By default, this value is set to "petstore.swagger.io/v2/swagger.json" as this is the official test json from SmartBear.
You can change this value to point to your own API file:
By using CONFIG method in your init.js file:
CONFIG.set("swagger-ui-url", "<your path to your json file here>");
config.json
{
  "domain":"0.0.0.0",
  "swagger-ui-url":"<your path to your json file here>"
   ...
}
swagger-ui-external
This is a special setting that is set to false by default. It is meant to allow you to use the Swagger UI library files from the CDN (read more about the ways using Swagger UI here
in the SwaggerUI GitHub repo ).
To use the SwaggerUI from the CDN and add it as a component in QCObjects without having network related issues, use the swagger-ui-external setting to let the SwaggerUIController to know that the path from the value present in the swagger-ui-package-path is coming from an external source. For instance: When you set up the value swagger-ui-package-path to 'unpkg.com/swagger-ui-dist' (official basePath from SwaggerUI Unpkg CDN, see https://github.com/swagger-api/swagger-ui/blob/master/docs/usage/installation.md#unpkg ), then you can set the value swagger-ui-external to true.
To use SwaggerUI from the UNPKG CDN
CONFIG method in your init.js file:
CONFIG.set("swagger-ui-package-path", "https://unpkg.com/swagger-ui-dist/");
CONFIG.set("swagger-ui-external", true);
config.json
{
  "domain":"0.0.0.0",
  "swagger-ui-package-path":"https://unpkg.com/swagger-ui-dist/"
  "swagger-ui-external":true
   ...
}
NOTE: If you use the SwaggerUI from the Unpkg CDN, you don't need to do the step 2 of this tutorial.
I hope this tutorial helps you to build your API documentation faster!
Cheers!

